

ComfyUI is an open source application for creating images, videos and audio with generative AI. It has earned a niche of enthusiast users thanks to its flexibility and its collaborative format.
Lately we’ve been tinkering with it quite a bit for some projects, so here are some of the takeaways we learned!
Why Comfy?
Let’s say you want to create an image using AI. Generally speaking, you have two choices:
Use an existing service, such as Midjourney, DALL-E2, ChatGPT, Imagen, Runway etc. Quick and easy, but it does not allow for much customization;
Code a custom pipeline to decide exactly which input you will give, which output to generate, and everything that happens in between.
ComfyUI sits somewhere in the middle. It allows you to precisely define how the generation works using a visual interface, without writing code. And at the same time, if you know how diffusive models work, it makes very clear what is happening under the hood.
Most importantly, it is actively maintained by its community. Comfy users are continuously sharing new methods, developing add-ons and supporting the latest models.
Hardware requirements
When it comes to AI, one of the main drawbacks is the computation power required to perform certain tasks. To run ComfyUI efficiently, you will need:
a NVIDIA GPU with at least 8GB of VRAM (which is different from RAM!)
a modern CPU
at least 16GB of RAM
Windows 10/11, Linux or Mac (Apple Silicon)*
This is important: GPU speed determines how quickly images can be generated; GPU memory (VRAM) puts a hard limit on which models you can run. To run advanced models, such as those for video generation, you will probably need even more VRAM.
![2025-02-14-14-46-08_lnDrsbnepP_chrome.mp4 [video-to-gif output image]](https://substackcdn.com/image/fetch/$s_!p4by!,f_auto,q_auto:good,fl_progressive:steep/https%3A%2F%2Fsubstack-post-media.s3.amazonaws.com%2Fpublic%2Fimages%2F1e320c17-2bad-4035-957a-4bb46cdb9a1b_800x97.gif "2025-02-14-14-46-08_lnDrsbnepP_chrome.mp4 [video-to-gif output image]")
In case your machine does not fulfill those requirements, or if speed is a priority, you can still use an online service such as runcomfy, which also offers ready-to-use setups. However this comes with inherent costs, since you are virtually renting a powerful machine.
*for Mac users: ComfyUI is supported on Apple Silicon with some limitations (I use it on my MacBook Pro M1 from 2021), download it here.
Installation
ComfyUI comes in a handy standalone version, which is self-contained in a folder and does not rely on libraries installed elsewhere. This means that you can easily move it, copy it to another machine or even use it from an external drive. The folder tends to become large very quickly as we add models (at least tens of gigabytes!) so being able to move everything without losing functionality could be a life-saver.

You just need to download this file, extract it with 7-Zip, and double-click on run_nvidia_gpu.bat.
Workflows
Once launched, a terminal window will compile some stuff and, once finished, open a tab in your browser. This is where you will generate images. In order to do that, you will use workflows.

Workflows are what makes ComfyUI particularly easy to use. They are graphical interfaces made up of interconnected nodes that run in sequence. These are building blocks that define the AI image generation process. Each node represents a specific operation such as loading models, tweaking parameters or saving images.
Since every image generated by ComfyUI has attached to its metadata the information about its generation, you could also just drag-and-drop a generated image inside the GUI to access its workflow. This useful repository includes an extensive list of workflows, each one with its own image that you can drag into Comfy.
You can also easily share your workflow or find a premade one on websites like OpenArt, ComfyWorkflows and Civitai. There is also another useful resource, the ComfyUI Wiki, that features various guides, with downloadable workflows and links to all the required files to make them work.
Models and other chunky files
In itself, workflows are just the scaffolding. They need to be filled with operative files. These are stored in the ComfyUI folder and loaded with specific nodes.
You can generally expect to find a Hugging Face web page with some info and the possibility to download these files. Here are some of the best we tried:
To convert textual prompts into something that the computer can understand you will also need text encoders (find some of them here).
Settings
In an AI image generation workflow, these are the main parameters you will need to worry about:
CFG (Classifier-Free Guidance): also called guidance scale, controls how much the image generation process will follow the text prompt.
Seed: controls the specific configuration of noise texture that the model will use to generate the image. Each noise texture will lead to a different image
Steps: the number of steps is a key factor in achieving convergence, which refers to the point at which the image reaches its optimal state based on the given parameters. Using more steps than necessary will not lead to improvements.


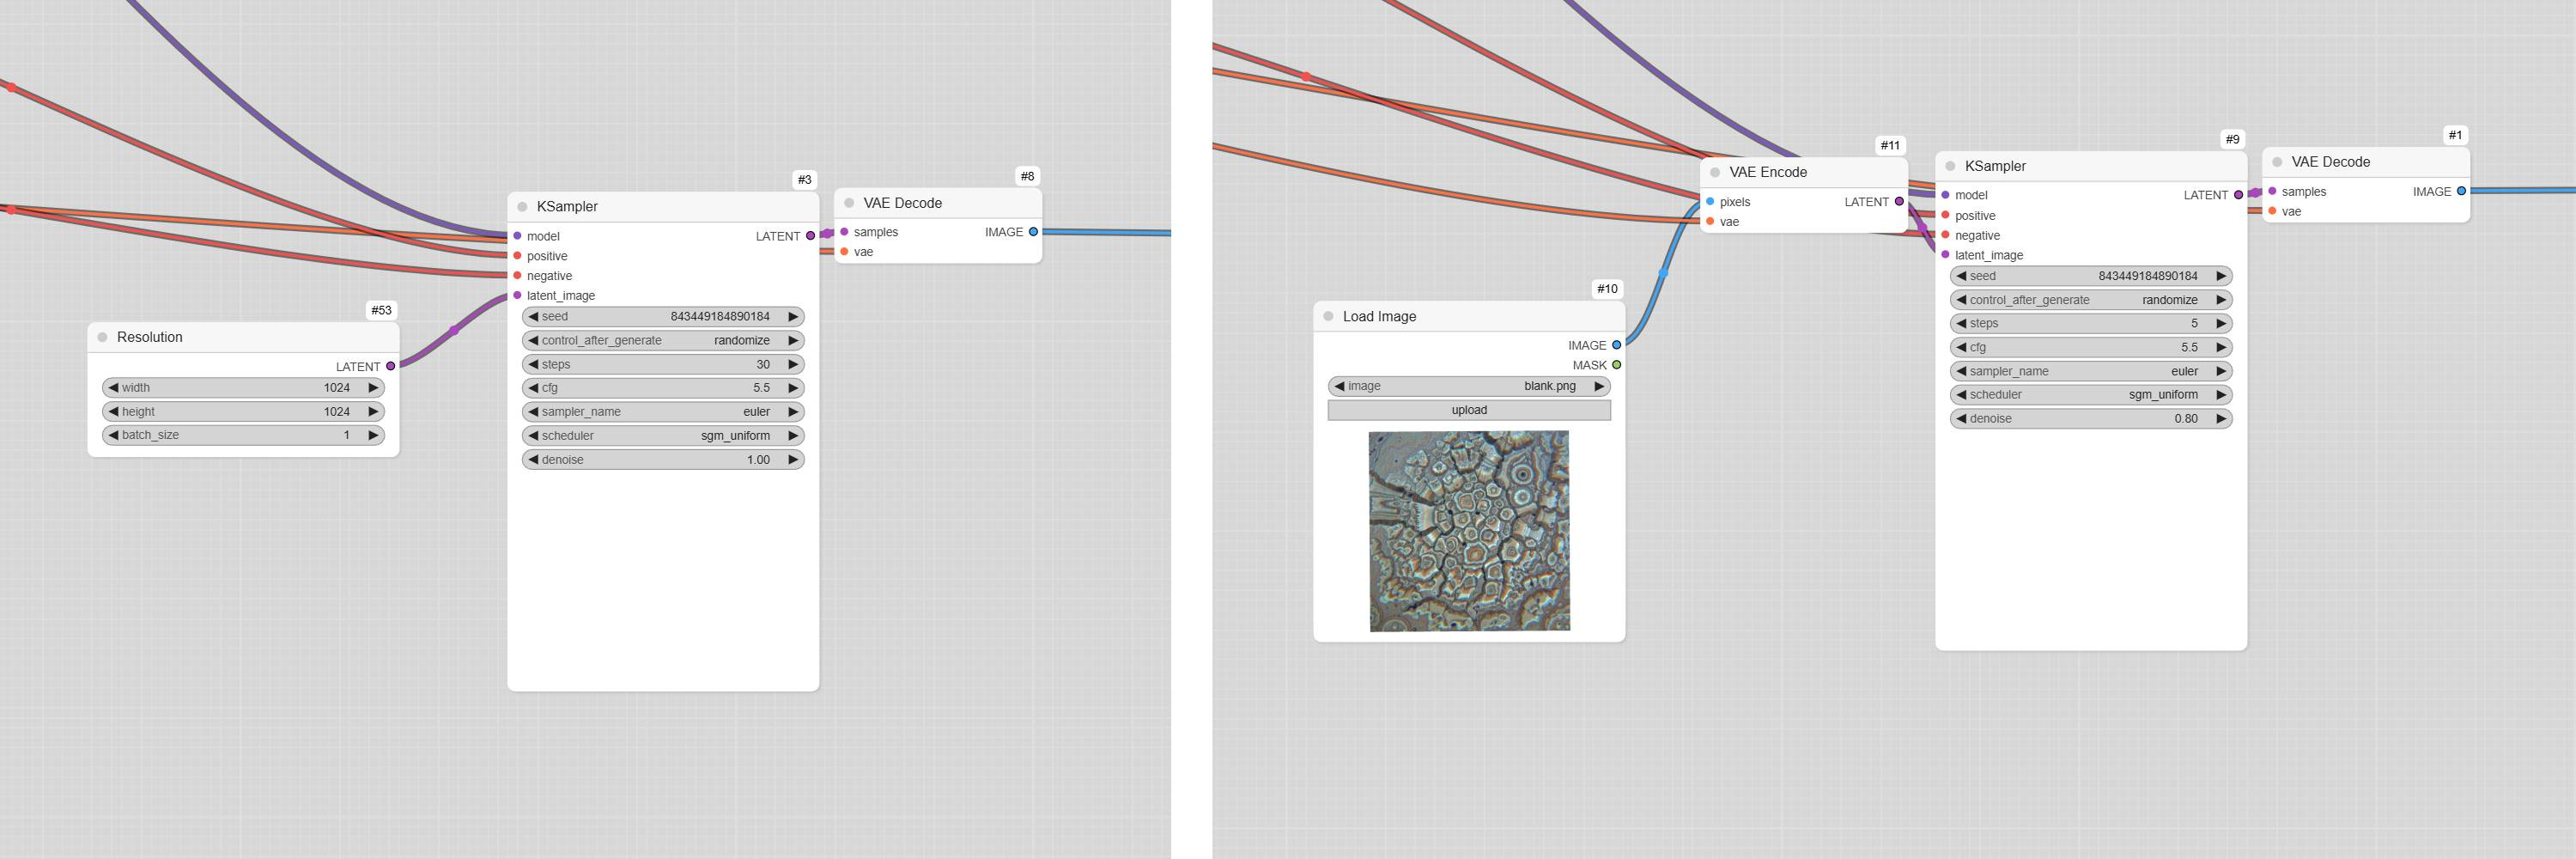
Image to image workflow
Diffusion models work by iteratively cleaning a noise until it becomes an image. Instead of starting from a random static, we can convert the reference image to noise instead. This noise retains the visual information and acts as a foundation on which the new image is built, using the text prompt as guidance. The cover animation of this article features images generated using the first frame as the input.
LoRAs
Some concepts are difficult to communicate to the machine with just words or one reference image. In this case you might need a LoRA. Using a LoRA is like adding a "plug-in" to a big AI model: instead of changing the whole model, you just tweak a small part to give it new abilities. For example, you could use a LoRA to teach the model a specific graphic style or an aesthetic.
Lots of them can be downloaded for free from Civitai, but make sure they are compatible with the model used in your workflow and to insert the correct activation word in the textual prompt!


Other useful workflows
Here is a quick guide to some of the most common “primitive” workflows, other than Text to Image and Image to Image.
Upscaling
Redraws an image at a larger resolution.Inpainting
Redraws only the masked areas of the initial image; used to make precise changes, such as changing or removing an object.Canny / Depth (ControlNet)
Those methods are similar: they both redraw the initial image by following its shape, while changing colors, materials and lighting.Pose
Allows to draw people in a very precise pose, deduced from a reference image.Style transfer (IP-Adapter)
Redraws an image with a different style.
All these workflows are for generating images, but they could also be applied to a video by working one frame at a time!
A text by Matteo Garagiola and Mattia Tafel, Creative Technologists at Giga
Hope you enjoyed :)
If you want to learn more about upcoming projects from Giga you can also follow us on Instagram and check our website.
Super interesting article guys! Thanks for sharing